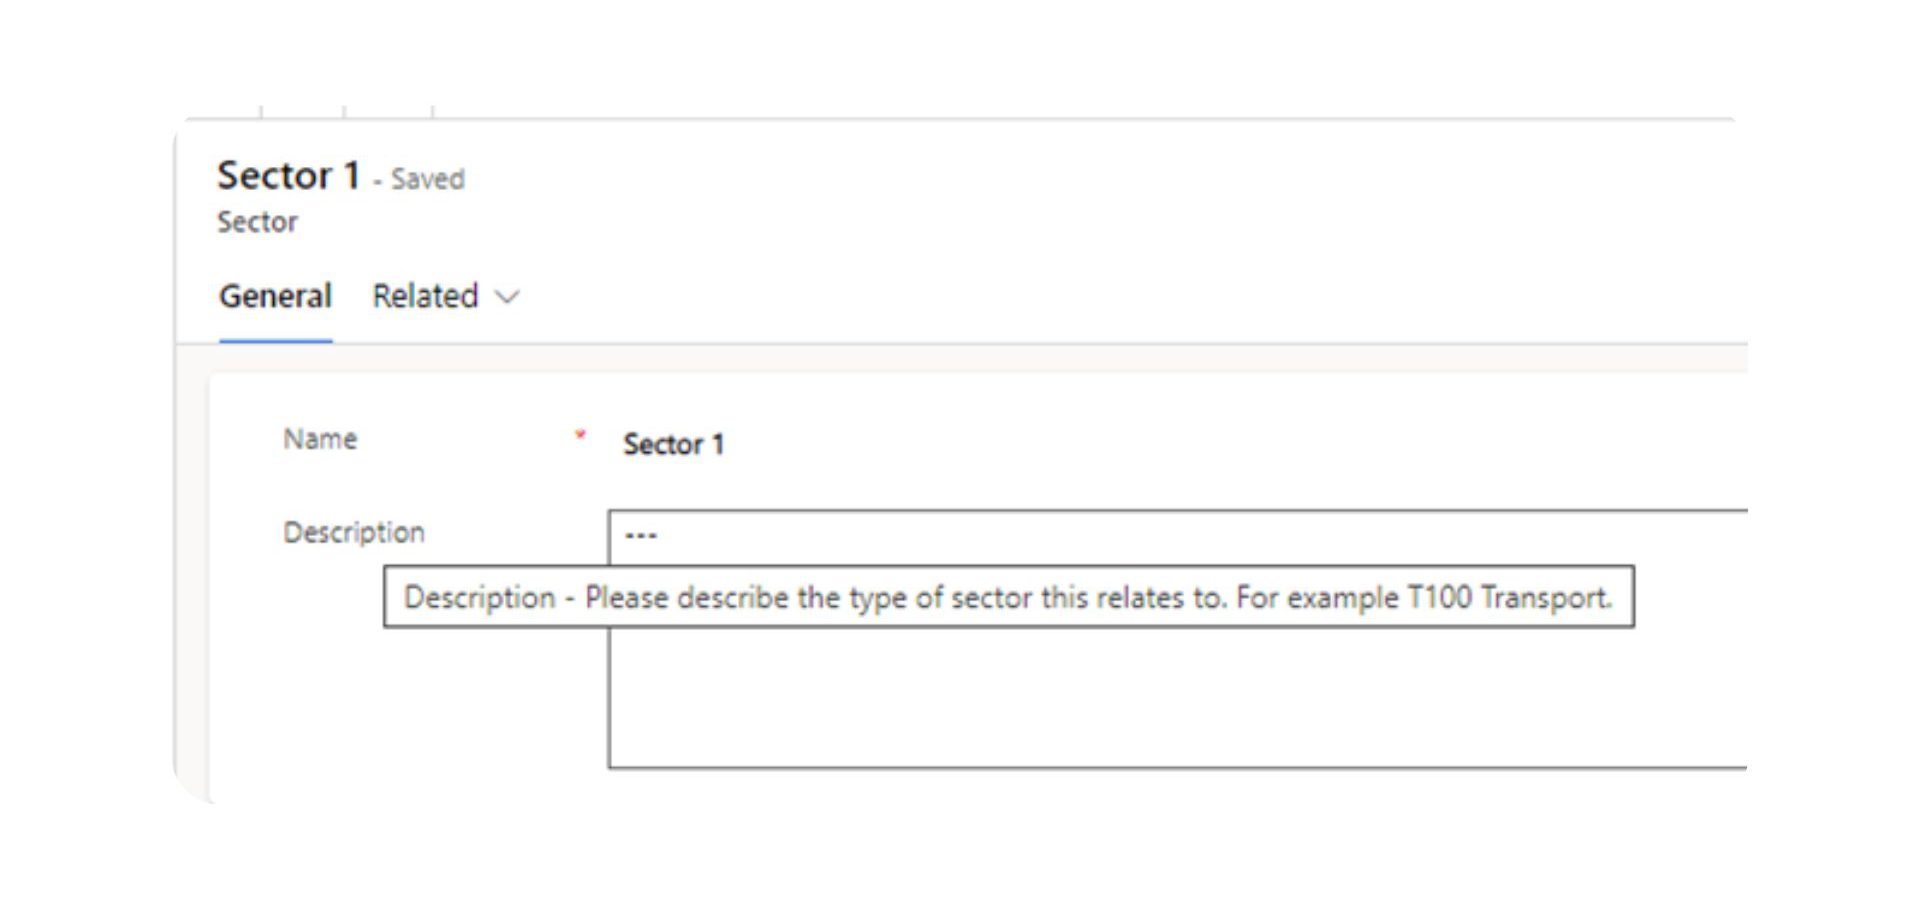
Tooltips in Dynamics 365 is a game-changing feature that can transform how your users interact with your CRM system. As expert D365 consultants, we’ve seen countless organisations struggle with data accuracy and user adoption – until they discovered the power of this feature. These smart, contextual helpers do more than just provide information; they act as virtual assistants, guiding users through data entry and reducing errors by up to 40% in our experience.
While creating new fields in both standard and custom tables, we understand that your end users need clear, instant guidance to input data correctly. This is precisely where tooltips shine – they provide immediate help exactly when and where users need it, turning potentially confusing fields into self-explanatory data entry points.
This blog will show you not just how to implement tooltips, but how to use them strategically to boost user confidence, slash training time, and significantly improve your CRM data quality. Whether you’re a system administrator or a business leader, you’re about to discover one of the most underutilised yet powerful features in Dynamics 365.
What Are Tooltips in Dynamics 365?
They are helpful text prompts that appear when users hover over a field in Dynamics 365. They serve as built-in documentation, providing immediate guidance about what information should be entered and how it should be formatted.
Why Use Tooltips?
- Improve data quality by guiding users to input correct information
- Reduce user training time and support tickets
- Provide context-sensitive help exactly where it’s needed
- Enhance user adoption of your CRM system
- Maintain consistency in data entry across your organisation

Step-by-Step Guide to Adding Tooltips
Prerequisites
- Access to Power Apps maker portal
- Appropriate security permissions to modify field properties
- Your solution file containing the fields you want to modify
Implementation Steps
- Access Power Apps
- Navigate to make.powerapps.com
- Sign in with your credentials
- Locate Your Field
- Open your solution file
- Find the table containing the field you want to modify
- Select the specific field
- Add the Tooltip
- Locate the Description field in the field properties
- Enter your tooltip text
- Save your changes
Few Best Practices
- Keep It Concise
- Use clear, direct language
- Aim for 1-2 sentences maximum
- Focus on the essential information
- Be Specific
- Explain exactly what data should be entered
- Include format requirements if applicable
- Provide examples when helpful
- Use Consistent Language
- Maintain the same tone across all tooltips
- Use similar phrasing for similar types of fields
- Avoid technical jargon unless necessary
Real-World Example

Let’s say you have a “Description” field where users need to enter specific details about a customer interaction. Your tooltip might read:
“Enter a brief summary of the customer interaction, including key discussion points and any follow-up actions. Example: “Discussed Q2 requirements, scheduled follow-up demo for next week.”
Testing Your Tooltips
After implementation, we recommend:
- Testing tooltips in both web and mobile interfaces
- Gathering user feedback on tooltip clarity
- Monitoring if data quality improves in fields with tooltips
- Adjusting tooltip text based on user questions and feedback
Impact on User Experience
Well-implemented tooltips can:
- Reduce user confusion and frustration
- Speed up data entry processes
- Improve overall data quality
- Increase user confidence in using the system
Conclusion
Tooltips are more than just helpful hints – they’re powerful tools that can transform your Dynamics 365/CRM user experience. By implementing tooltips strategically, you can significantly reduce user errors, increase data quality, and boost system adoption across your organisation. The small effort required to set up tooltips pays dividends in improved efficiency and reduced support needs.
Remember that the key to successful tooltip implementation lies in clarity, consistency, and user-centricity. Start with your most frequently used or error-prone fields, gather user feedback, and iterate based on real-world usage. This approach ensures that your tooltips truly serve their purpose of guiding users effectively.

Need Help with Your D365?
At Osmosys, our experienced Dynamics 365 consultants can help you:
- Implement tooltips across your CRM system
- Optimise your field configurations
- Provide user training and support
- Enhance your overall CRM experience
Contact our experts today to discuss how we can help improve your CRM system’s usability and effectiveness.


