Today, delivering exceptional customer service isn’t just an option – it’s a necessity. Microsoft Dynamics 365’s ticketing system stands out as a powerful solution that can revolutionise how you handle customer support.
Let’s unfold how to leverage this robust system to enhance your customer service operations.
Why Your Business Needs a Dynamics 365 Ticketing System?
Picture this: A customer submits a support request through your website at 3 AM. Instead of getting lost in an email inbox, the request automatically transforms into a tracked ticket, gets routed to the right team member, and triggers a response – all while you’re sleeping. This is the power of D365’s ticketing system.

Key Features That Set D365 Ticketing Apart
1. Intelligent Ticket Management
- Automatic ticket creation across all channels (web, email, social media, phone)
- Smart routing based on agent expertise and availability
- Real-time ticket status tracking and updates
- Seamless ticket merging to eliminate duplicates
2. Advanced Case Management Capabilities
Modern customer service demands more than basic ticket handling. Microsoft CRM deliver:
- Parent-child case relationships for complex issue management
- AI-powered similar case suggestions
- One-click conversion of resolved cases to knowledge articles
- Comprehensive timeline views of customer interactions
3. Service Level Agreement (SLA) Tracking
Never miss a deadline with:
- Visual countdown timers for response deadlines
- Automated compliance notifications
- Customisable SLA rules for different customer tiers
- Real-time tracking of service commitments
Setting Up Your Ticketing System: A Step-by-Step Guide
- Initial Configuration
- Set up user roles and permissions
- Configure automatic ticket routing rules
- Customise ticket fields and forms
- Set up email templates for automated responses
- Knowledge Base Integration
- Create and organise support articles
- Set up article suggestions for common issues
- Enable AI-powered content recommendations
- Configure customer portal access to the knowledge base
- Customer Portal Setup
- Configure customer authentication
- Set up self-service options
- Enable ticket creation and tracking
- Integrate knowledge base access
Step-by-Step Implementation Guide
Prerequisites
- Access to D365 Service Hub
- Administrative privileges
- Active portal setup
Setting Up Contact and Account Management
- Contact Setup
- Add new or select existing Contact
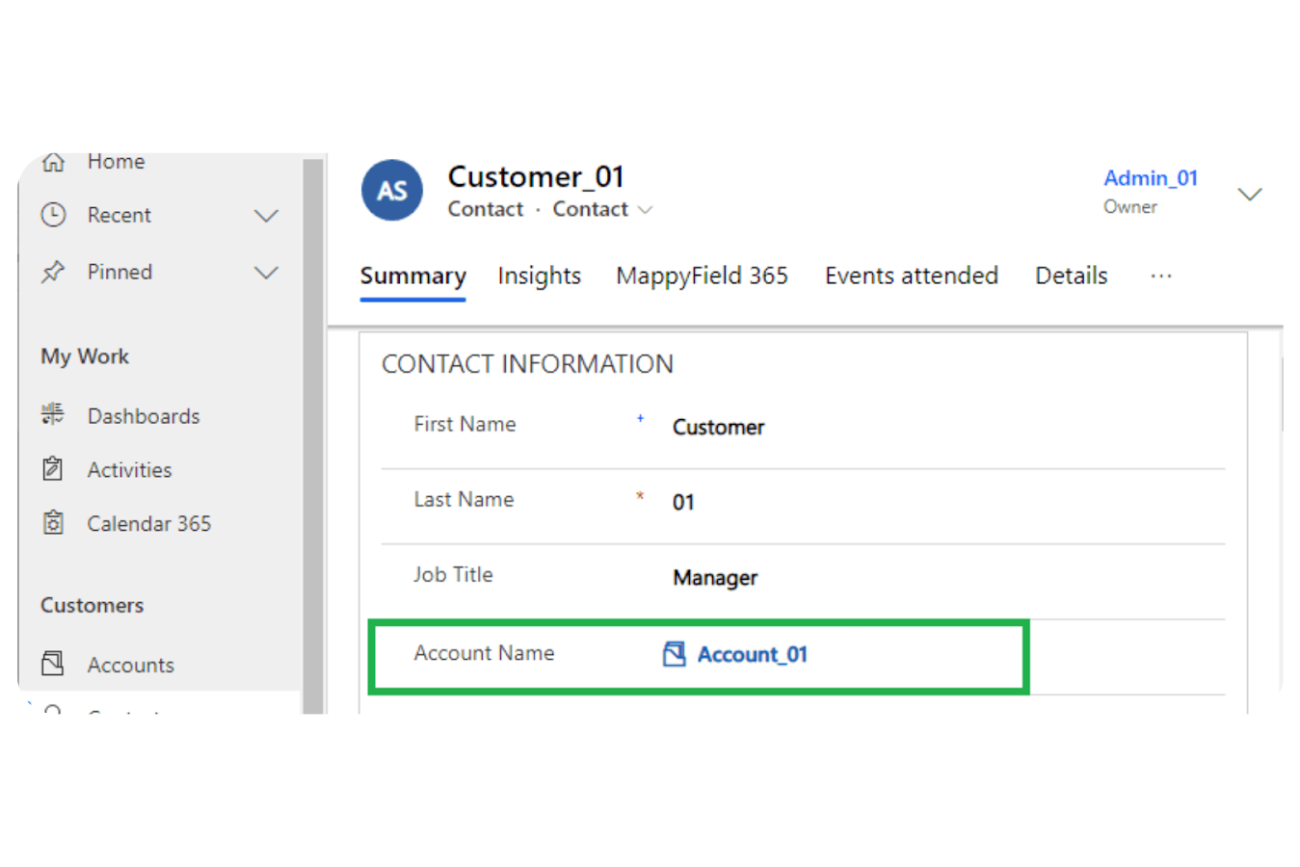
- Assign appropriate Account to the Contact
- Verify contact information is complete
- Set proper security roles
- Account Configuration
- Ensure Account is set as Customer
- Configure Account relationships
- Set up proper hierarchies if needed
Portal Configuration
Administrative Setup
- Access the portal as Admin
- Navigate to “Portal User Management” → “Roles”
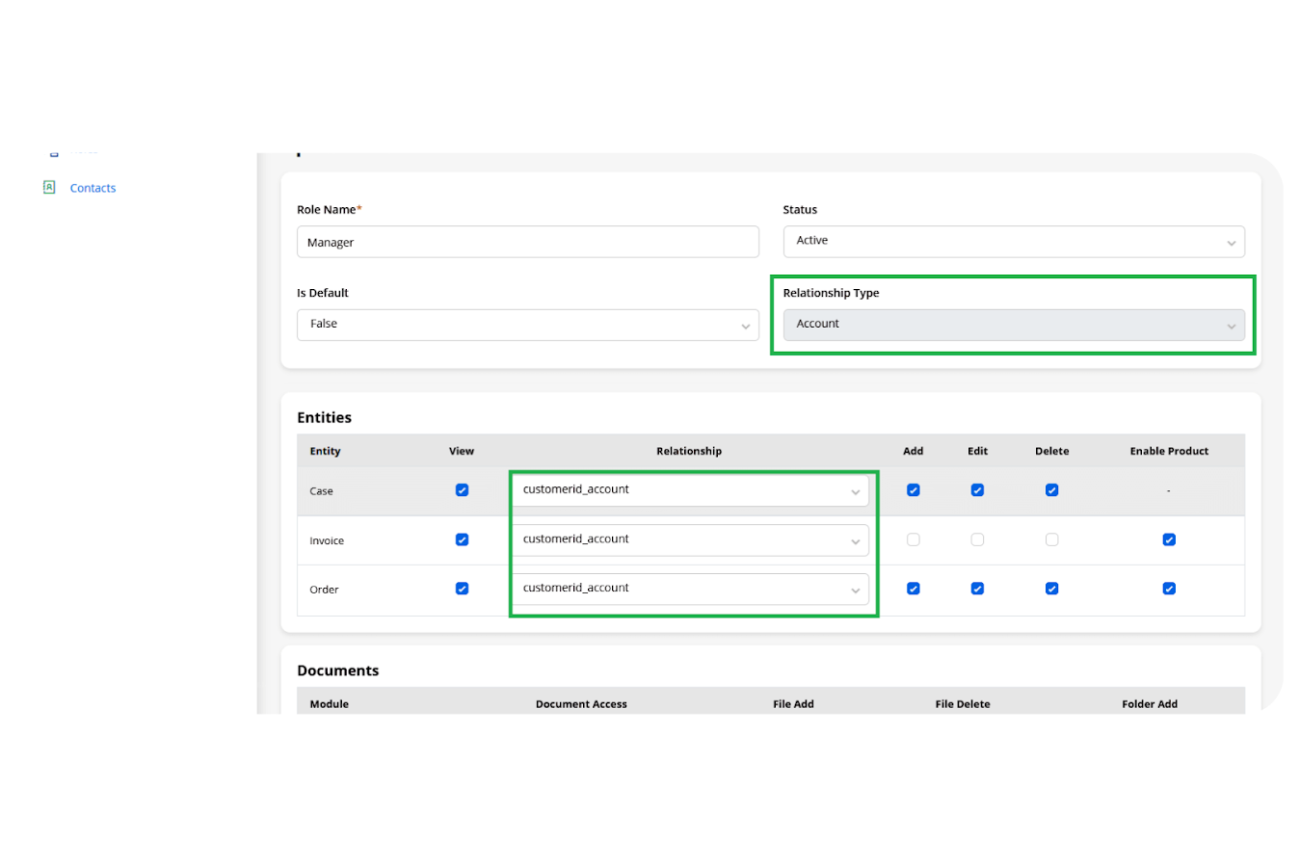
- Create new Role with following settings:
- Set Relationship Type as “Account”
- Select Entity access permissions
- Configure Account-based relationship fields
- Save and publish role settings
Customer Portal Setup
- Configure login page

- Set up the Cases section with the following features:
- View capabilities for account-associated cases
- Create case functionality
- Case management permissions
- Enable access to:
- Account-specific cases (e.g., “Account_01”)
- Other specific cases (e.g., “Customer_01”)

Ticket Management Configuration
- Automatic Ticket Creation Setup
- Configure email-to-case rules
- Set up web-to-case forms
- Enable social channel integration
- Configure phone channel settings
- Routing Rules Setup
- Create queue structure
- Define routing logic
- Set up escalation paths
- Configure SLA triggers
- Knowledge Base Integration
- Set up article templates
- Configure suggestion rules
- Enable automatic article creation from cases
- Set up portal knowledge access
SLA Configuration
- Basic SLA Setup
- Define service level terms
- Set up response time requirements
- Configure resolution time commitments
- Enable tracking mechanisms
- Advanced SLA Features
- Configure SLA Timer tool
- Set up notification system
- Enable status tracking
- Configure compliance monitoring

Analytics and Reporting Setup
- Dashboard Configuration
- Set up KPI tracking
- Configure real-time metrics
- Enable trend analysis
- Set up agent performance monitoring
- Report Generation
- Configure automated reports
- Set up custom dashboards
- Enable data export options
- Configure scheduling options
Best Practices for Maximum Efficiency
- Automate Repetitive Tasks
- Set up automatic ticket categorisation
- Create response templates for common issues
- Configure automatic escalation rules
- Enable automated status updates
- Leverage Analytics for Improvement
- Monitor key performance metrics
- Track resolution times and satisfaction rates
- Identify common issues and bottlenecks
- Use insights to optimise support processes
Measuring Success: Key Metrics to Track
Monitor these essential metrics to ensure your ticketing system is delivering value:
- Average resolution time
- First response time
- Customer satisfaction scores
- Ticket volume by channel
- Agent productivity metrics
Integration Capabilities
D365 Ticketing System seamlessly integrates with:
- Microsoft Teams for collaborative problem-solving
- Power BI for advanced analytics
- SharePoint for document management
- Power Automate for custom workflows
Future-Proofing Your Customer Service
The system continuously evolves with:
- AI-powered chatbots for 24/7 support
- Predictive analytics for proactive issue resolution
- IoT integration for automated ticket creation
- Advanced customisation capabilities
Conclusion
A well-implemented D365 can transform your customer service from a cost centre to a competitive advantage. By leveraging the platform’s robust features, you can create a support experience that not only resolves issues efficiently but also builds lasting customer relationships.
Ready to transform your customer service? Contact our experts today for a personalised consultation on implementing or optimising your ticketing system.


