2025 is almost here and staying on top of system updates is crucial for maintaining smooth operations. Microsoft Dynamics 365 BC regularly releases updates that can impact your processes. Here’s your comprehensive guide to ensuring the right people receive these important notifications.
Why Business Central Update Notifications Matter?
Before diving into the steps, let’s understand why managing Business Central Update Notifications is essential:
- Updates often contain critical security patches and new features
- Proper notification management ensures your team has time to test updates before deployment
- It helps prevent unexpected system behavior that could impact your operations
- Enables better resource planning for update implementation
Prerequisites
Before you begin, ensure you have:
- A valid Microsoft Partner Center account
- Either Global Administrator or Dynamics Administrator rights
- Access to your organisation’s BC environment
Detailed Step-by-Step Guide
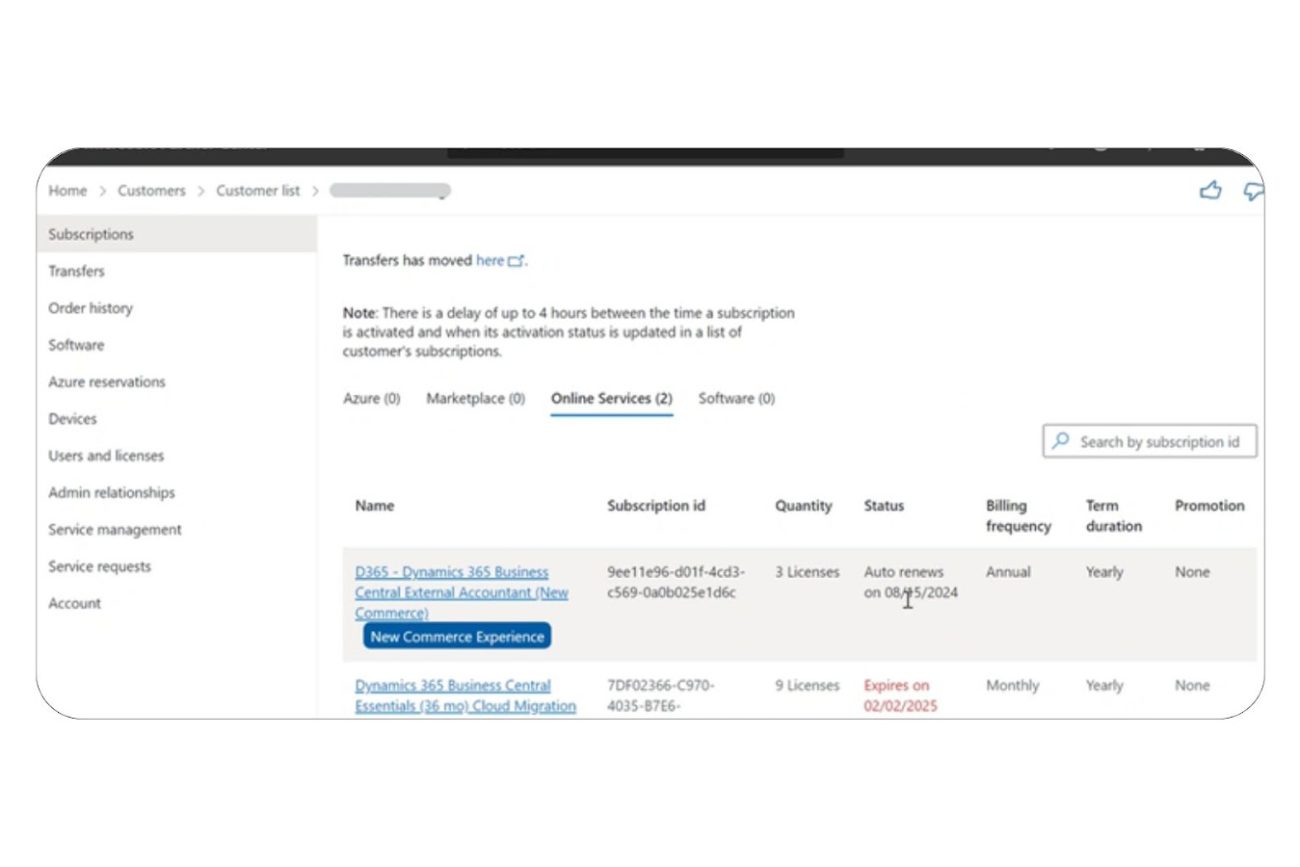
Step 1: Accessing the Partner Center
- Open your web browser and navigate to the Microsoft Partner Center
- Enter your credentials and complete any multi-factor authentication if enabled
- Wait for the dashboard to load completely

Step 2: Navigating to Service Management
- Look at the left-hand navigation panel
- Locate and click on “Service Management”
- If you don’t see this option, verify your administrative permissions

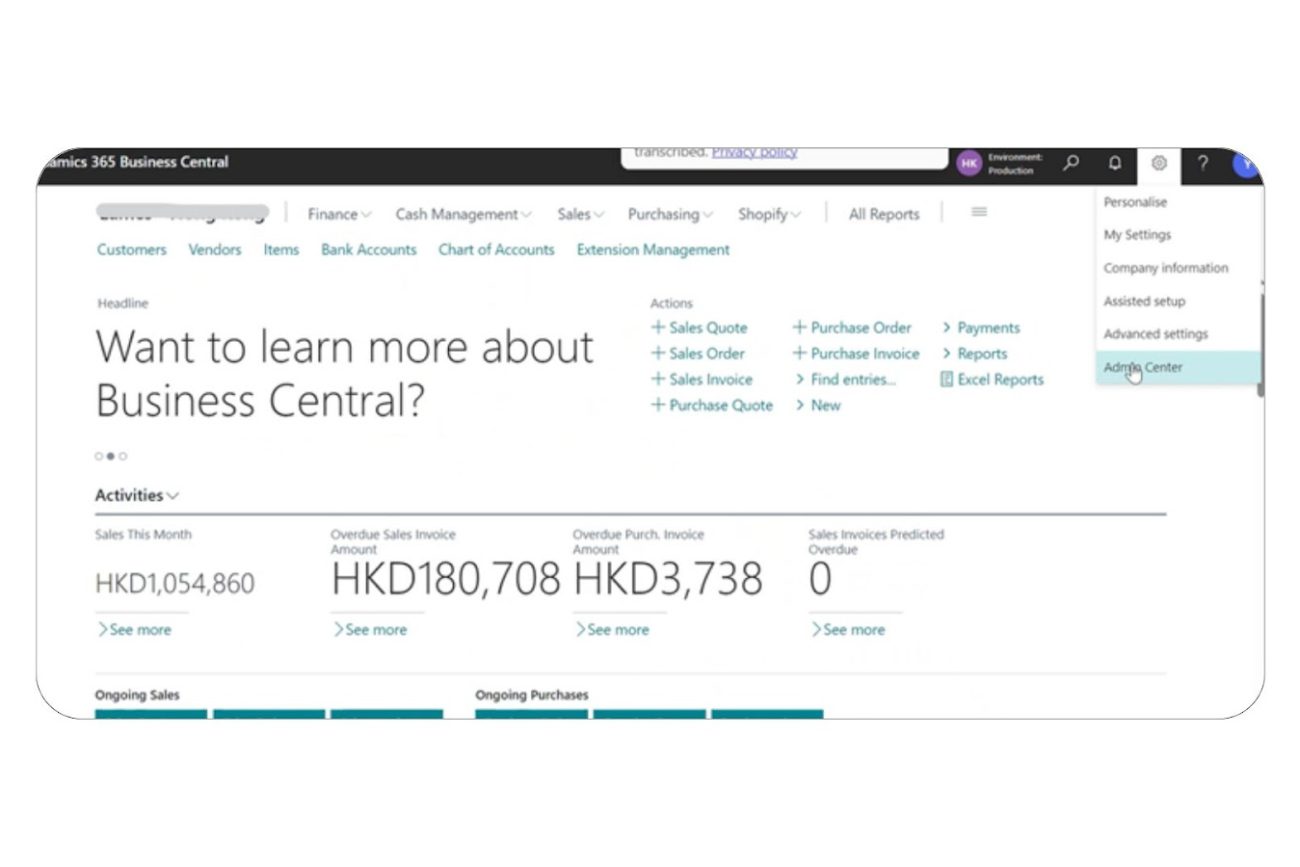
Pro Tip: If you’re a Global Administrator, you can alternatively access this through the Admin Center directly.

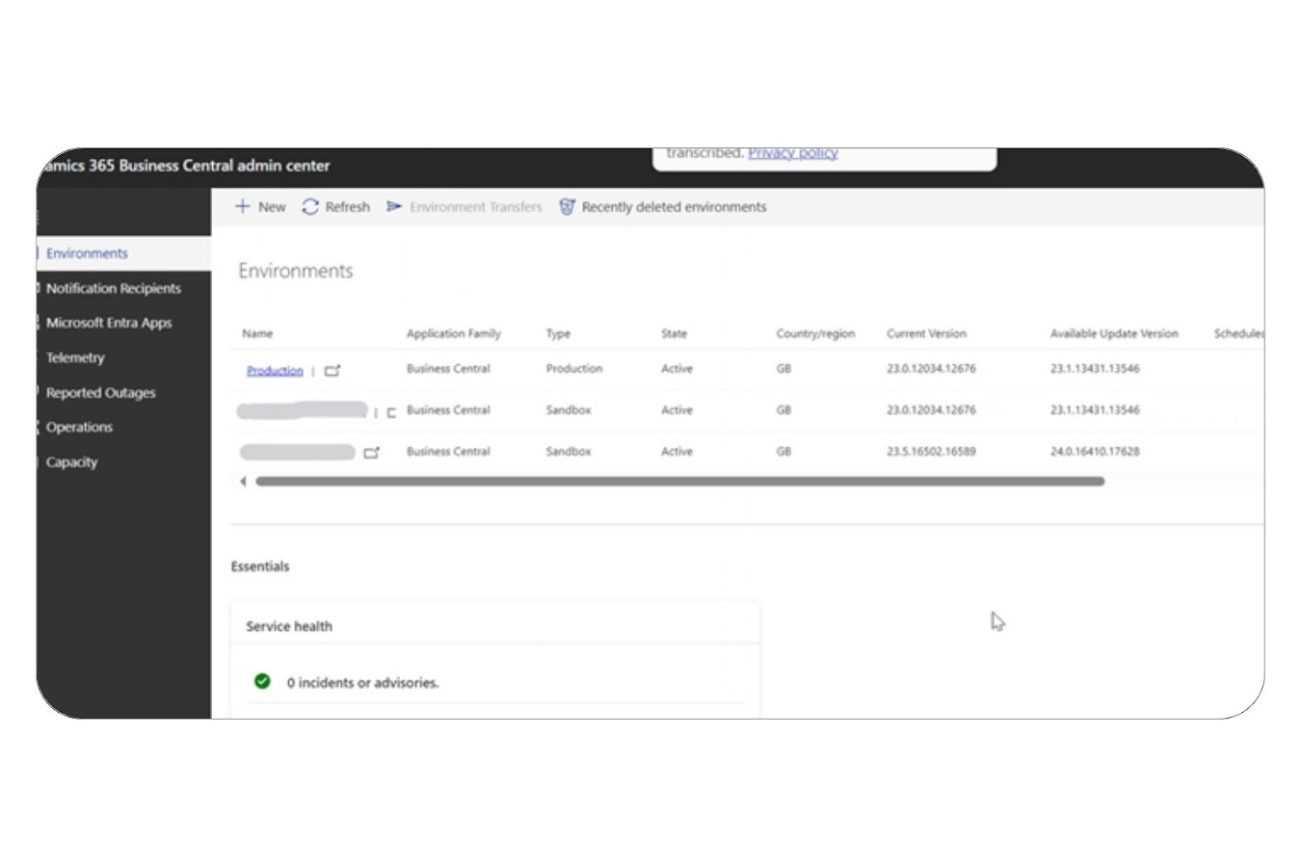
Step 3: Managing Recipients
- In the Service Management section, find “Notification Recipients” in the left menu
- Click to open the recipient management page
- You’ll see a list of current recipients if any are already configured
Step 4: Adding New Recipients
- Locate the “Add Recipient” button or similar option
- Enter the following details for each new recipient:
- Full name
- Valid email address
- (Optional) Department or role for reference
- Click “Save” or “Add” to confirm
Step 5: Removing Recipients
- Find the recipient you want to remove from the list
- Look for a delete icon or remove option
- Confirm the removal when prompted
Best Practices for Notification Management
To make the most of your update notifications:
- Designate primary and backup recipients for redundancy
- Include team members from both IT and operations
- Create a distribution list for sharing important updates within your team
- Maintain a document logging who receives which notifications and why
- Regularly review and update your recipient list
What to Do After Setting Up Business Central Update Notifications?
Once you’ve configured your recipients:
- Have recipients check their email filters to ensure notifications aren’t marked as spam
- Set up a process for sharing relevant updates with broader teams
- Create a testing schedule for incoming updates
- Document your update review and implementation procedures
Troubleshooting Common Issues
If recipients aren’t getting notifications:
- Check spam folders
- Verify email addresses are entered correctly
- Ensure recipients have the necessary permissions in Business Central
- Contact Microsoft Support if issues persist
For more information, access Manage Tenant-Specific Notifications.
Conclusion
Effective Business Central Update notifications management is key to maintaining a robust BC environment. Keep your recipient list updated and ensure your team knows how to respond to update notifications when they arrive.
Need ongoing support with D365 BC? Our expert team at Osmosys is here to help you maximise your system’s potential and ensure smooth operations. Reach out today to learn more about our support services.
Stay informed about Business Central’s best practices, tips, and tricks by subscribing to our blogs.


