

What exactly are SLAs?
SLAs, or Service level Agreements, establish the level of service provided to clients in many businesses. Using SLAs in Dynamics 365 Customer Service, we can define the level of service or support an organization agrees to provide a customer. Providing help based on service levels guarantees that you deliver measurable and predictable results. SLAs provide advantages such as tracking service level performance and goals, prioritization of cases, and reminders to customer service employees.
To configure SLAs, we must first construct SLA KPIs and SLA items, and then apply the SLA via entitlements or a default SLA, as discussed in this blog.
Steps to Get Started
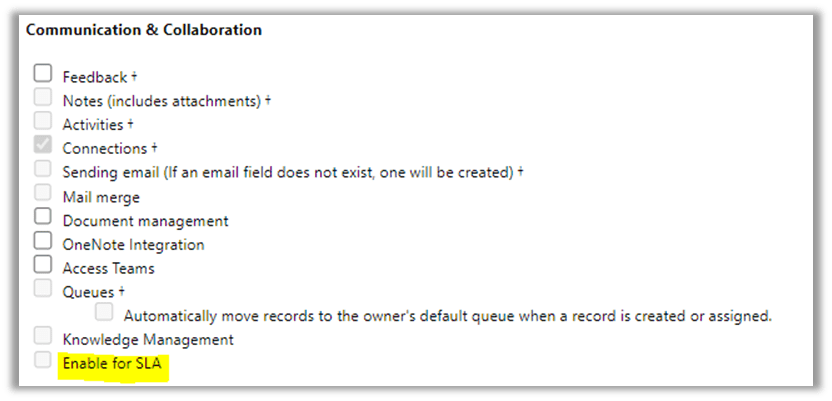
To begin building SLA for an entity, we must first ensure that SLA is enabled for that entity.
- Open Custom Solution for this.
- Select the entity from the left pane.
- Check the Enable for SLA check box under Communication & Collaboration.
- Save and publish your work
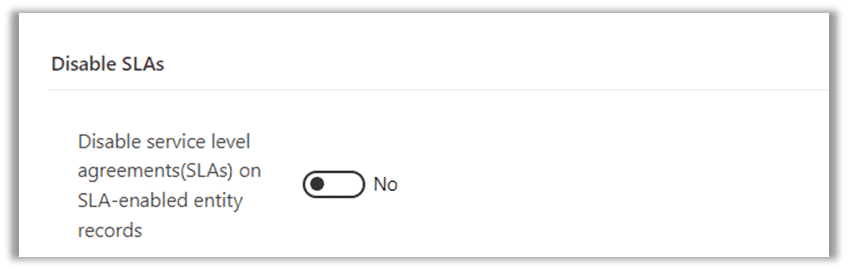
Additionally, we must ensure that SLAs are not disabled because of this.
Open the Service Configuration Settings window.
Ensure Disable SLA is configured to No.
Setting up Holiday and Customer Service Schedule
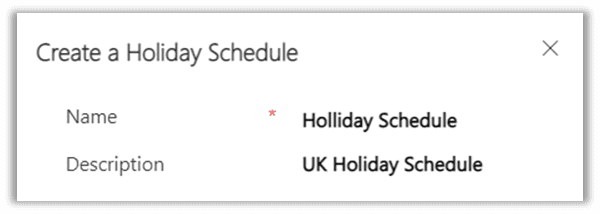
We can avoid our SLAs being affected and recorded on the days when service organization is closed by creating a Holiday Schedule Calendar.
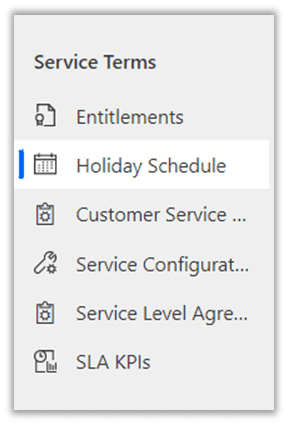
- Open Holiday Schedule in Service Management
- Click New, Add Name and Description then click Create
- Select New in Holiday Grid
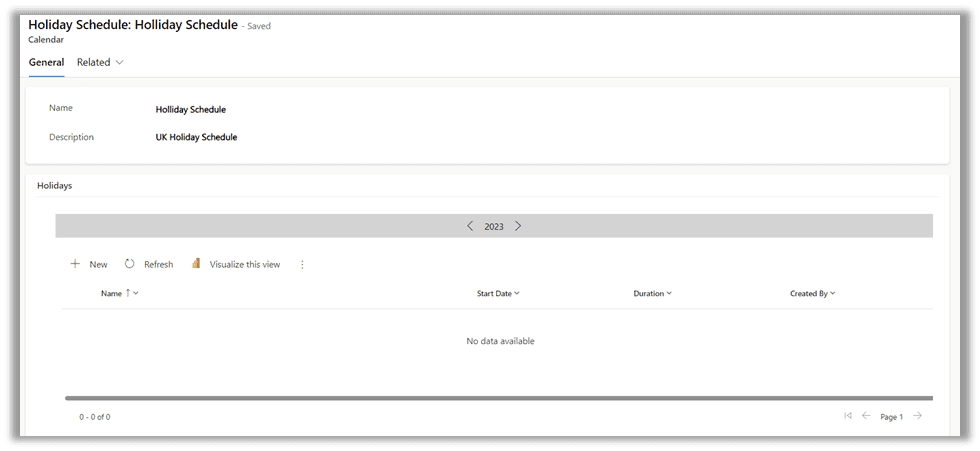
- Add details
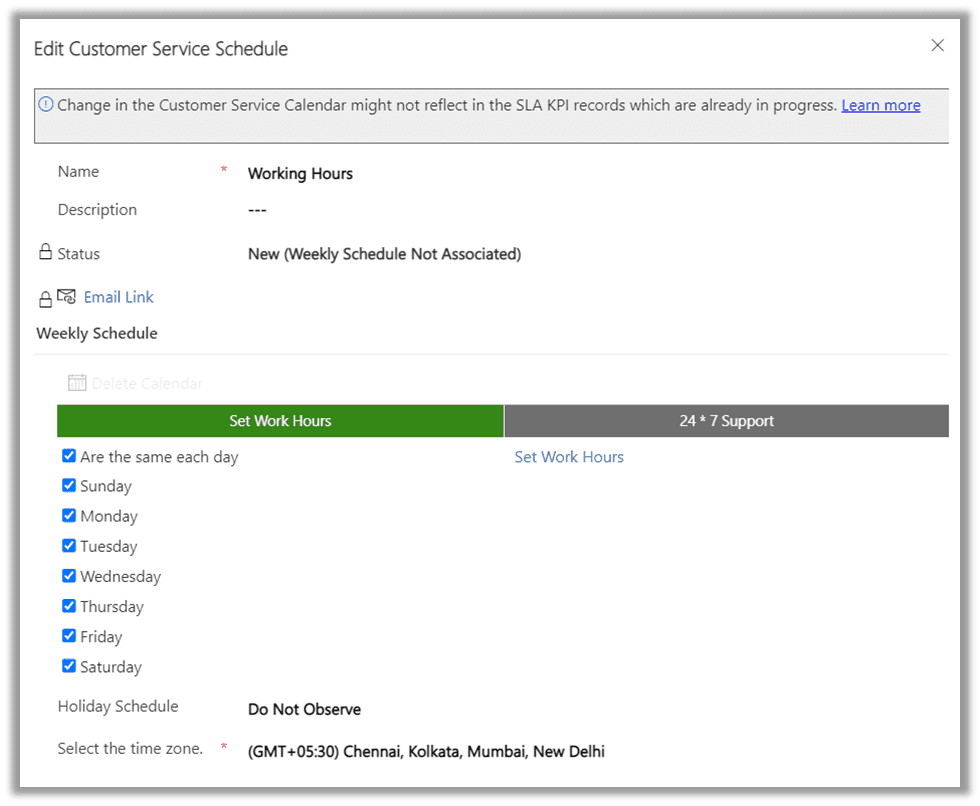
We need to associate this Holiday schedule with a Customer Service Schedule later.
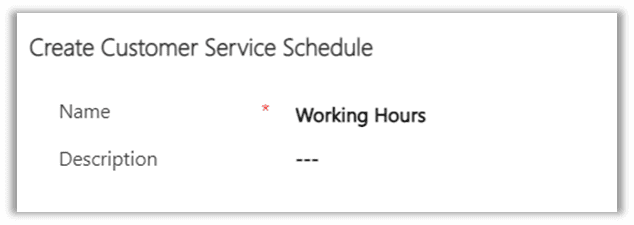
Customer Service Schedule store details of business hours of each day and weekly off. These details are used in the time tracking of SLAs by customer service. For Creating Customer Service Schedule,
- Open Customer Service Schedule in Service Management
- Click New, Add Name and Description then click Create
- Under Weekly Schedule select the work hours for day by using Set Work Hours and days of the week when customer service is available.
- In Holiday Schedule select Observe and select the created Holiday Schedule.
Creating SLA KPIs
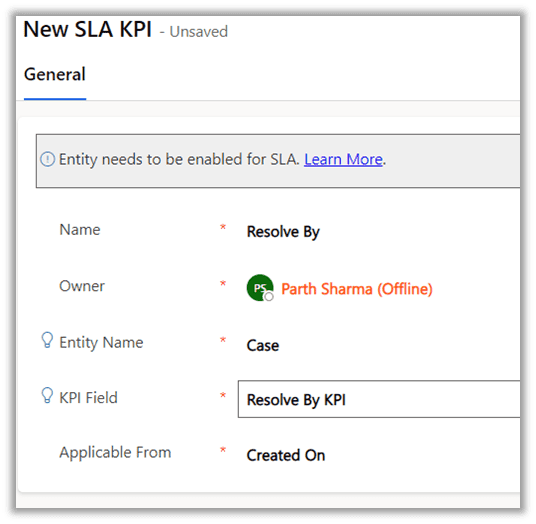
SLA KPIs are the performance indicators that we want to track. It holds the data for the KPI field, entity and which field the KPI is applicable from.
- Open SLA KPIs in Service Management and select new, here we can add the required data:
Name: The name of the SLA KPI.
Entity Name: Select the entity for which the KPI will be measured.
KPI Field: Select the respective KPI field.
Applicable From: Select a value based on which the warning and failure time will be measured
- KPI Fields define N:1 relationship between the entity and the SLA KPI Instance entity. We can create our own by creating a lookup field for the SLA KPI Instance Entity on the required entity.
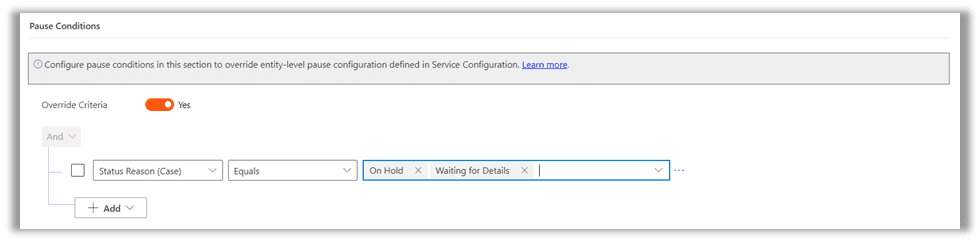
- We can define Pause Conditions for the SLA KPI. For example, if we want the KPI to pause if the Status Reason of the entity is set to either On Hold or Waiting for Details
Creating SLA
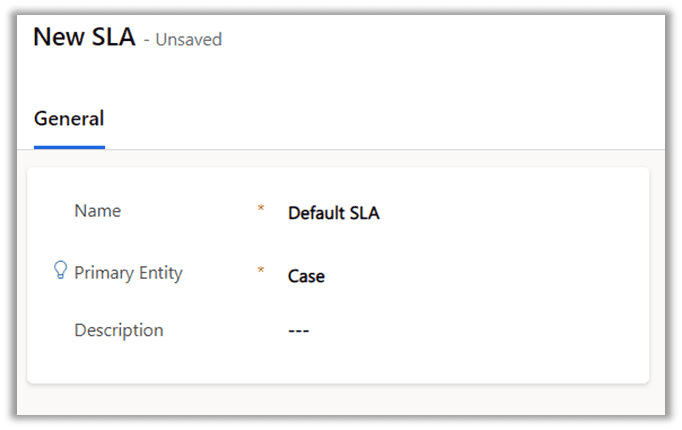
- On Service Management, Select SLA then NEW
- Enter the Name, Description, and Primary Entity
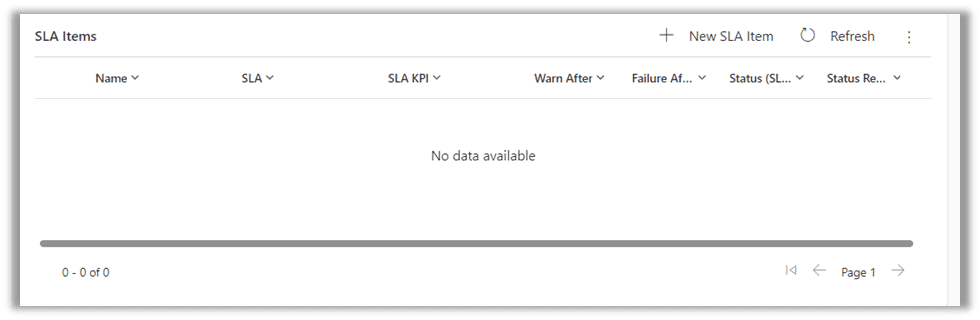
- Save the form to view SLA Item section
Creating an SLA Item
A SLA can have multiple SLA items associated with it. A SLA item determines the Warning and Failure Time based on the Applicable from field on the SLA KPI and gives us features to specify conditions and actions. To add SLA Item to SLA:
- Open SLA record and select New SLA Item to open dialogue
- Enter the required details:
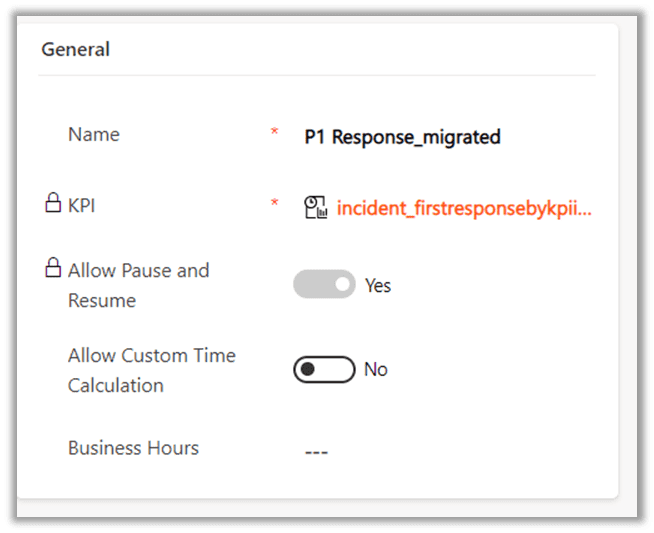
Name: Item name
KPI: Select the KPI to be associated
Allow Pause and Resume: Enable this option if you want the SLA to be paused during the time the record is on hold.
Business Hours: Select the Customer Service Schedule entity to be associated
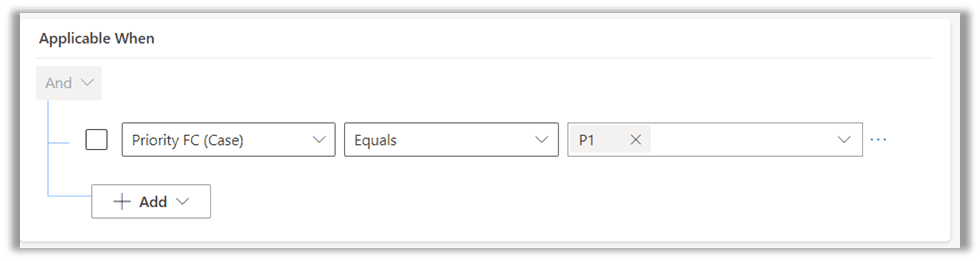
- In the Applicable When section, we can define the conditions for the entity when the SLA can be applied.
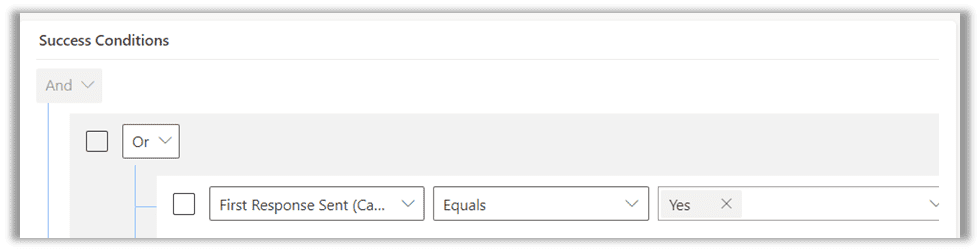
- In the Success Conditions section, we define the success criteria for our SLA
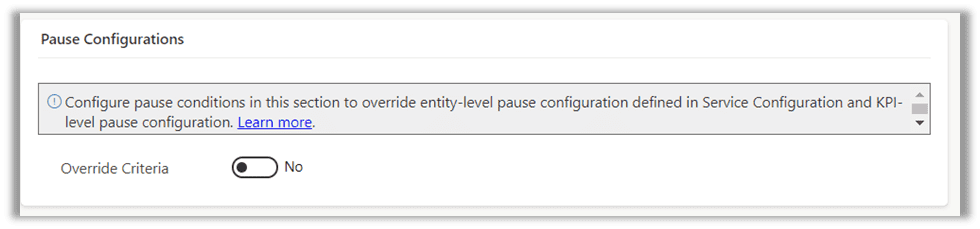
- In the Pause Configurations section we can add conditions to pause SLA item. Select Yes in Override Criteria to override settings defined at entity, Service Configuration or SLA KPI level.
- In Warn and Fail Duration section, add time after which warning and failure notifications are sent.

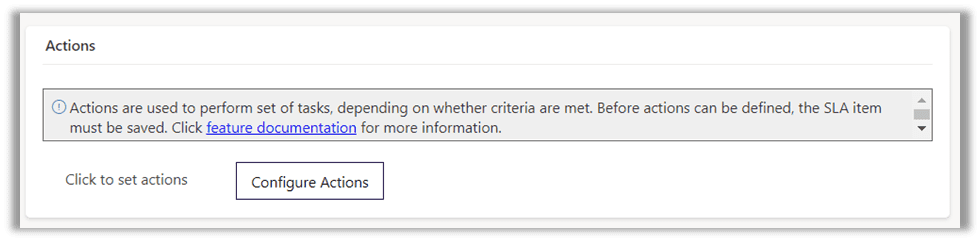
Configuring Actions
In an SLA Item, we can also configure actions to be triggered based on SLA success, failures, or for warnings. For this,
- Select Configure Actions, in the action pane of the SLA item to open Power Automate.
- Select Continue to confirm the connection.
- A predefined flow specific to SLA appears.
- We can see the Switch step in the flow which has three conditions
Is Nearing Non-Compliance: Will run when the warning time is reached for the SLA
Is Succeeded: Will run when the SLA succeeds
Is Non-compliant: Will run when the SLA fails

- Under each condition we can add an action to be executed such as send a warning email based on SLA conditions.